In the past SQLServer offered native webservice support, but this was deprecated in SQLServer 2008 and recommended to be replaced with WCF or .Net custom application. Since many applications require a webservice to exchange data (e.g. from mobile apps to interface mechanisms that rely on a data API) I wanted to describe how to easily setup a webservice layer with OAuth2 authentication in JSON format.
Create Web API project
- Create a new ASP.Net Web Application

- Choose Web API

- For authentication click Change, and select “Individual User accounts”. This will create the support for the Auth2 authentication.
- Once created, right-click references and select “Manage NuGet packages”
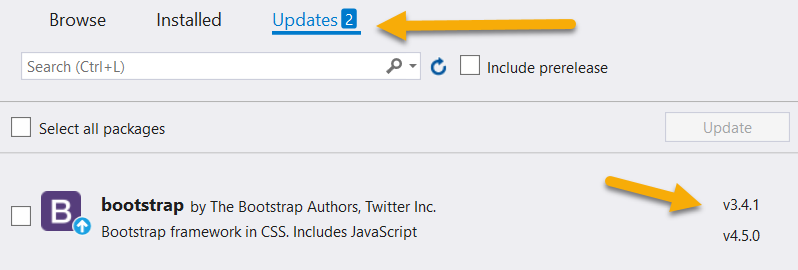
- In order to test the Web API, let’s install the Swashbuckle package on the Browse tab

- Update all libraries, except bootstrap. Keep bootstrap at version 3.x.x (as v4 has breaking functionality)
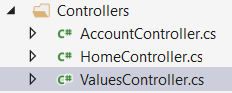
- In the Controllers folder you’ll find a sample API Controller class ValuesController, which illustrates how implement your webservice
Extend Web API
Implement SQLServer connectivity
Let’s create a new API Controller to get data from a SQLServer database. The service would return a list of Country objects retrieved from the database.
Create a basic class in the “Models” folder to represent a Country.
using System;
using System.Collections.Generic;
using System.Linq;
using System.Web;

namespace SQLAPI.Models
{
    public class Country
    {
        public int id { get; set; }
        public string code { get; set; }
        public string name { get; set; }

    }
}
Create a new Controller by right-clicking on “Controllers” folder and select “Add”, “Controller…”. For this basic controller we’ll use Web API 2 with read/write. It’s possible to create a Controller for Entity Framework Data context.![]()
By default, the controller will return a list of strings for it’s GET operations. Let’s return our Country object. I’ll only implement the operation to return a list of Countries, but you’ll find it easy to implement the other operations to.
using SQLAPI.Models;
using System;
using System.Collections.Generic;
using System.Configuration;
using System.Data.SqlClient;
using System.Linq;
using System.Net;
using System.Net.Http;
using System.Web.Http;

namespace SQLAPI.Controllers
{
    [Authorize]
    public class CountryController : ApiController
    {
        private IEnumerable<Country> QueryCountries(string sql)
        {
            List<Country> listCountry = new List<Country>();

            string cs = ConfigurationManager.ConnectionStrings["DW"].ConnectionString;
            using (SqlConnection con = new SqlConnection(cs))
            {
                SqlCommand cmd = new SqlCommand();
                cmd.Connection = con;
                cmd.CommandType = System.Data.CommandType.Text;
                cmd.CommandText = sql;
                con.Open();
                SqlDataReader rdr = cmd.ExecuteReader();
                while (rdr.Read())
                {
                    listCountry.Add(new Country
                    {
                        id = Convert.ToInt32(rdr["ID"]),
                        code = rdr["Code"].ToString(),
                        name = rdr["Name"].ToString()
                    });
                }
            }

            return listCountry;
        }
        // GET: api/Country
        public IEnumerable<Country> Get()
        {
            string sqlText = "SELECT ID, Code, Name " +
                             "FROM dbo.Dim_Country " +
                             "ORDER BY Code";

            return QueryCountries(sqlText).ToArray();
        }
    }
}
Make sure to add the [Authorize] annotation before the class, as this will ensure that all calls in the class will have to be made with the access token, which confirms that the user is authorized to call this operation.
In the web.config, we’ll have to add a connectionstring to the database, which is called “DW” in above code.
<connectionStrings>
  <add name="DW" connectionString="Server=sql.axis0.be\BI;Database=DW;Trusted_Connection=True"/>
...
</connectionStrings>
Make sure the IIS AppPool has access to the database.
Facilitate Authorization through Swagger
In App_Start/SwaggerConfig.cs we’ll make following changes:
AuthorizationOperationFilter
This class will be used to add an Authorization field when calling the API through Swagger. In App_Start, add a class AuthorizationOperationFilter with following implementation:
using Swashbuckle.Swagger;
using System;
using System.Collections.Generic;
using System.Linq;
using System.Web;
using System.Web.Http.Description;

namespace SQLAPI.App_Start
{
    public class AuthorizationOperationFilter : IOperationFilter
    {
        public void Apply(Operation operation, SchemaRegistry schemaRegistry, ApiDescription apiDescription)
        {
            if (operation.parameters == null) operation.parameters = new List<Parameter>();

            operation.parameters.Add(new Parameter
            {
                name = "Authorization",
                @in = "header",
                description = "access token",
                required = false,
                type = "string"
            });
        }
    }
}
AuthTokenOperation
This class will add a new operation to the Swagger path, that will allow us to retrieve the authorization token needed to pass with each request to the API. In App_Start add the following class:
using Swashbuckle.Swagger;
using System;
using System.Collections.Generic;
using System.IO;
using System.Linq;
using System.Web;
using System.Web.Http.Description;

namespace SQLAPI.App_Start
{
    public class AuthTokenOperation : IDocumentFilter
    {
        public void Apply(SwaggerDocument swaggerDoc, SchemaRegistry schemaRegistry, IApiExplorer apiExplorer)
        {
            swaggerDoc.paths.Add("/token", new PathItem
            {
                post = new Operation
                {
                    tags = new List<string> { "Auth" },
                    consumes = new List<string>
                    {
                        "application/x-www-form-urlencoded"
                    },
                    parameters = new List<Parameter>
                    {
                        new Parameter
                        {
                            type = "string",
                            name = "grant_type",
                            required = true,
                            @in = "formData",
                            @default = "password"
                        },
                        new Parameter
                        {
                            type = "string",
                            name = "username",
                            required = false,
                            @in = "formData"
                        },
                        new Parameter
                        {
                            type = "string",
                            name = "password",
                            required = false,
                            @in = "formData"
                        }
                    }
                }
            });
        }
    }
}
Swagger configuration
In the App_Start/SwaggerConfig.cs class, add following lines to the EnableSwagger call:
// include this
using SQLAPI.App_Start;

...

GlobalConfiguration.Configuration
                .EnableSwagger(c =>
                    {
// add only these 2 lines
c.DocumentFilter<AuthTokenOperation>();
c.OperationFilter<AuthorizationOperationFilter>();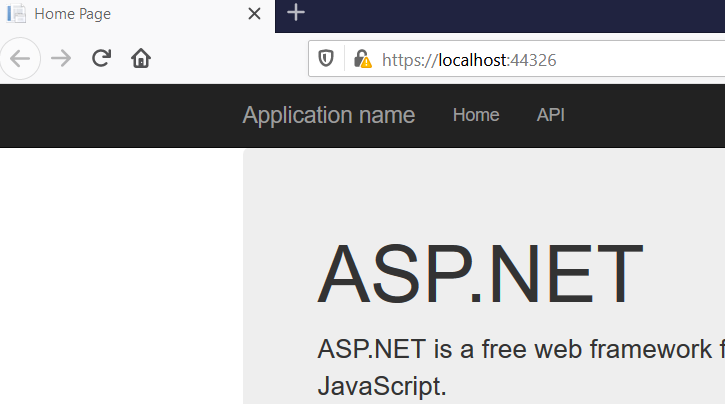
Test Web API
Finally we can test our REST API. Start the project with the default setup using IISExpress. A browser will open with the home page of our project.
When you click on API, you’ll get all documentation of the project generated through introspection.
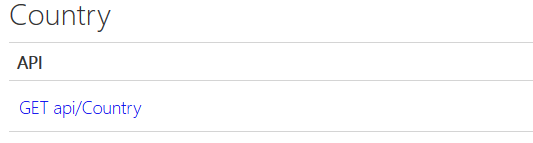
We can see at the bottom our new API to retrieve countries. Clicking on the link will provide the contract and possible responses in JSON and XML. Normally you’d use a free tool link Postman to test the API, but we’ve added Swagger with the ability to send the access token.
To use the Swagger API application, add /swagger to the root URL. 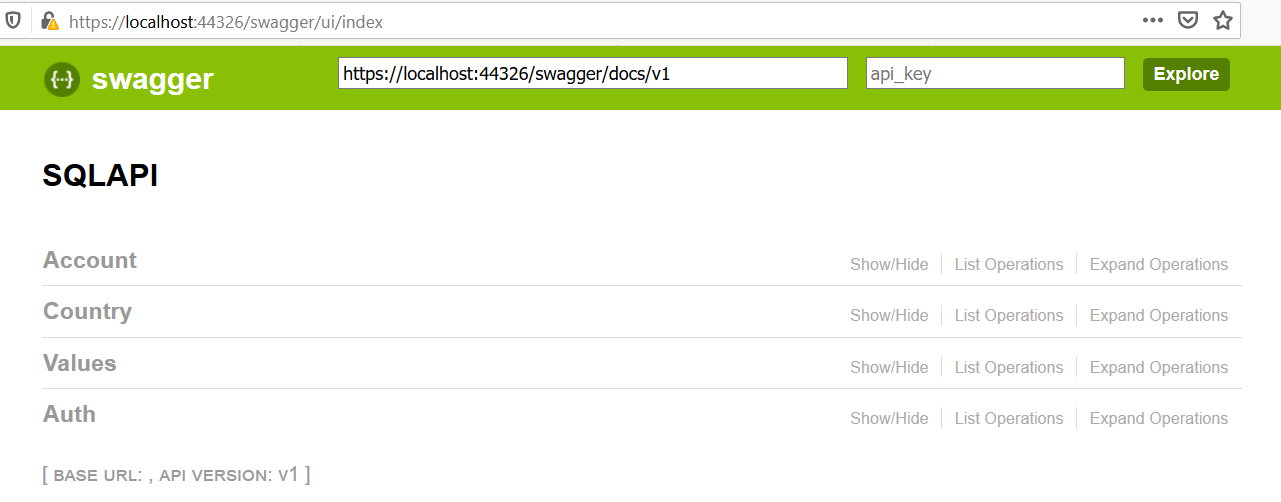
From here, we’ll perform the next set of tests. This is the flow needed to authenticate and call the country webservice.

Register account
Click on Account and then on POST /api/Account/Register. This will give you the ability to call the service with the required parameters, and capture the reponse. Click on the example JSON, to have the parameter prefilled. Modify the values to register your account.
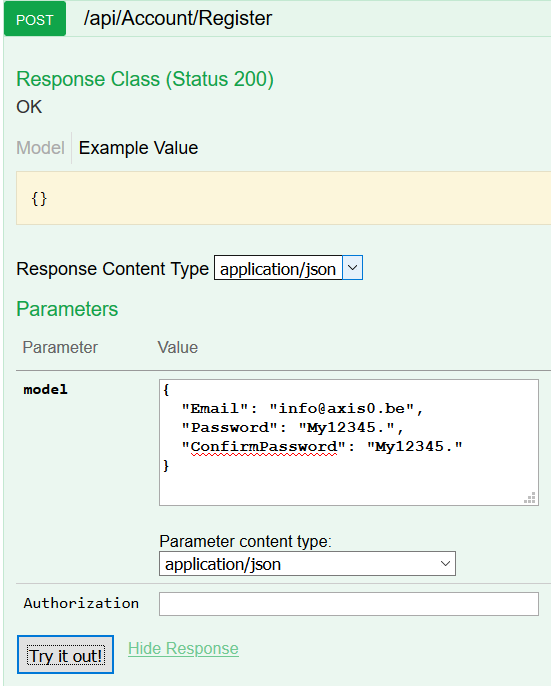
Press “Try it out” to submit the request. You’ll normally get a response code of 200, all went well and the account is created. Now we need to get the access token.
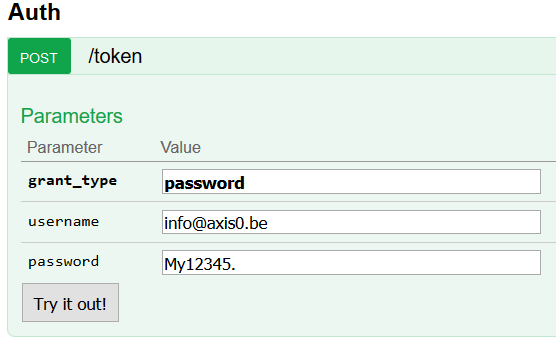
Get access token
To retrieve the access token (which is valid for a preconfigured period of time), we can use the Auth /token which we added with the AuthTokenOperation class.
The response this time includes the access token, and information about its validity.
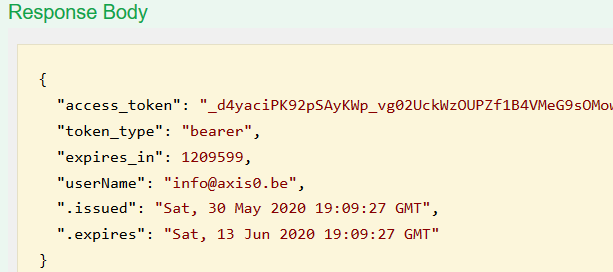
Copy the value of the access_token, as we’ll use it in the next call with which we prove to have access to this webservice.
Call Web Service
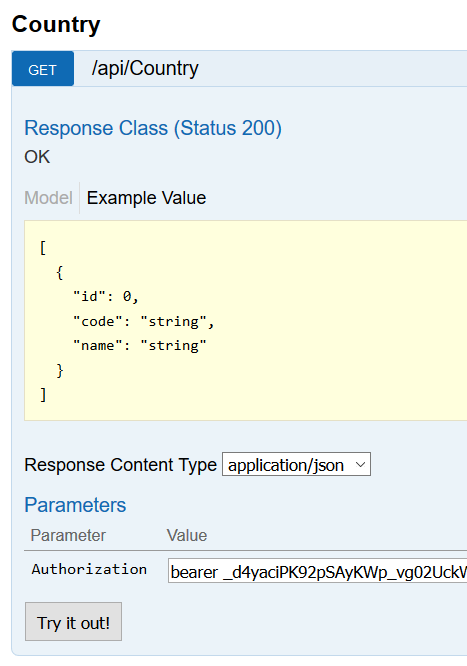
To finally get our list of Countries, let’s go to the Country section, and use the GET /api/Country operation.
In the parameter field Authorization, specify “bearer”, a space and paste the value of the token retrieved from the /token call.
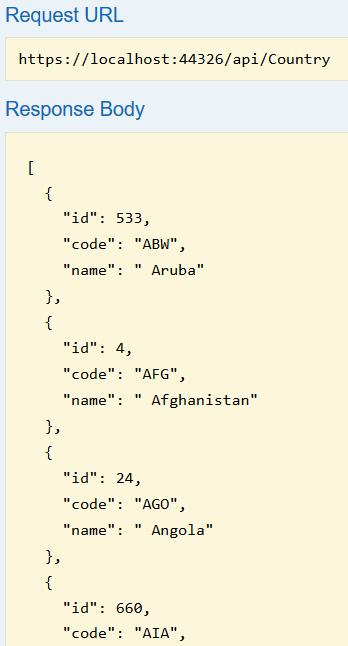
When you press Try it out, the Controller will invoke the code to retrieve that countries from the database, add them in a list, and return them serialized in JSON.
As you can imagine, this is just the beginning of the possibilities. Implementing pagination, updates, deletions and many more can be added now in the project.
Download
Download the code at the Git repository
Read More
If you’re working a lot with SQLServer, you might be interested in an article where I explain how to create a report for your SQLAgent job runs.