When you install SQLServer on an Azure virtual machine, you can take advantage of the D: drive that comes with such a VM.
Its characteristics are that it is local, so fast access to the drive, but it is erased at every reboot, a true temporary drive. It is rather limited in size, so you might want to use it only if you foresee your tempdb to be within that limit. The size is related to the size of VM, so you can increase it by increasing the VM size (thus increasing costs as well).
But if that is enough for you, it could make sense to store your SQLServer tempdb on that drive, and not lose precious diskspace/backup/io when collocating it on another disk, or create and pay a separate disk for it. Here below in summary the steps to take to set this up:
- Create directory
- Move tempdb
- Create startup recreate script
- Setup Task Scheduler
- Test
Create tempdb directory
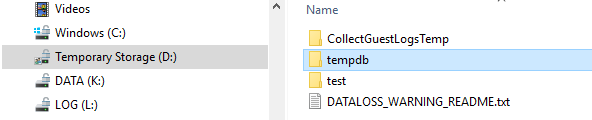
On the temp drive (usually D:), create a directory (e.g. tempdb) in which you will locate the datafiles.
Make sure to give the user running SQL Server Service full access to that directory. Normally, you’d have a dedicated service account for that purpose.
Move tempdb
As you probably already have a SQLServer instance, you will need to move your existing tempdb to this drive. The script below changes the file location of the datafile and logfile of the tempdb (make sure to use your data file names in the below query).
USE master;
GO

ALTER DATABASE tempdb
MODIFY FILE (NAME = tempdev, FILENAME = 'D:\tempdb\tempdb.mdf');
GO

ALTER DATABASE tempdb
MODIFY FILE (NAME = templog, FILENAME = 'D:\tempdb\templog.ldf');
GO
Only after restarting SQLServer the tempdb will be created and used from the D: drive. Verify the change with following script:
SELECT name, physical_name, state_desc
FROM sys.master_files
WHERE database_id = DB_ID(N'tempdb')
You did it! Or did you… ?
Create Startup script
Moving the tempdb to the local drive is good for now, but after a restart of your VM, those files will be gone as well as that directory. Your SQLServer will no longer be able to start as it can’t find its tempdb.
To mitigate that, we’ll run at startup a PowerShell script that recreates the directory. Once it is present, SQLServer can start without problems.
This is the script:
$SQLService="SQL Server (BI)"
$SQLAgentService="SQL Server Agent (BI)"

$tempfolder="D:\tempdb"

if (!(test-path -path $tempfolder)) {

   New-Item -ItemType directory -Path $tempfolder
}
Start-Service $SQLService
Start-Service $SQLAgentService
The keen observer might wonder “What about this permissions on the directory?” Well, that’s be solved by running this script under the SQLServer account, so it has inherently the permissions to use it.
Setup Task Scheduler
We’ll schedule this script in Windows Task Scheduler. Create a new task with a Trigger “At Startup”. Make sure to use the service account of SQLServer to run the script with, and also check that it’s run with highest privileges.

As Action specify the PowerShell command as Progam : “C:\Windows\System32\WindowsPowerShell\v1.0\powershell.exe”
As Arguments specify -file “C:\scripts\createTempDBFolder.ps1”
Test
It’s a separate chapter in this tutorial, so it’s important : test, test and test again. Make sure your setup works, as you don’t want to have something not working with starting without tempdb.
Also test the performance of the new file location, as depending on your configuration, you might not get the benefit you hoped for.
Lastly, you could also set a maximum size for the tempdb, so it doesn’t fileup the D: drive. Have a look at the command
ALTER DATABASE tempdb MODIFY FILE ( NAME = N'tempdb', SIZE = 8192MB , FILEGROWTH = 0MB );