Here are three easy ways to change your RDP port number of an Azure VM.
1. Azure Portal
This is a good way when you don’t want to login to the machine. It does all the manual steps you’d have to think of otherwise.
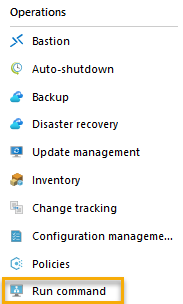
- Go to to Operations section on your VM blade and click on Run Commands
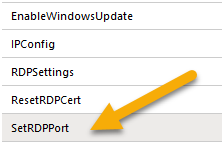
- Click on SetRDPPort
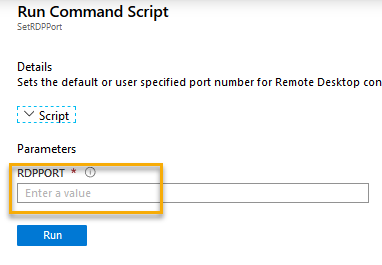
- In the input form enter the new RDP port number
2. On the VM
The method always needs looking up, as I also forget the exact keys.
- Login to RDP session on the VM as Administrator
- Open RegEdit
- Go to key HKEY_LOCAL_MACHINE\SYSTEM\CurrentControlSet\Control\Terminal Server\WinStations\RDP-Tcp
- Find the PortNumber setting, and change it to the desired port number (make sure to select decimal)
- Make sure your machine firewall and Azure NSGs and firewall allow you to contact this new port before doing the next step
- Restart the Remote Desktop Services service. The session will be disconnected and you can reconnect on the new port.


3. PowerShell on the VM
If you’re not keen on opening regedit and searching for the right key, you can also use the following command in a PowerShell with Administrator privileges to change the port to 3389. Again, make sure your firewalls allow the new port and restart the Remote Desktop Services service for changes to become active.
Set-ItemProperty -Path “HKLM:\SYSTEM\CurrentControlSet\Control\Terminal Server\WinStations\RDP-TCP\” -Name PortNumber -Value 3389Read More
If you’re interested in Azure VM, you might like this article in which I describe how to upgrade the Azure VM OS in 1 hour, without reinstalling the entire machine – Azure VM OS Upgrade