Now that we setup the logins, the key vault and the function that will do the unlocking, it’s time to make sure any unlocked logins are also automatically locked again, so we don’t leave logins open.
Elastic Jobs
The idea of elastic jobs is that the same job can be executed on multiple servers that are part of the target group of these jobs. A job can have multiple job steps, similar to what is used in SQL Agent at this time.
You’ll have to setup 1 database that will be the main control database for elastic jobs. This can be a S1 Azure SQL database, and should be empty. More info can be found here : Create and manage Elastic Database Jobs (preview) with Transact-SQL (T-SQL) – Azure SQL Database | Microsoft Learn
Make sure to give job_login also access to this new database.
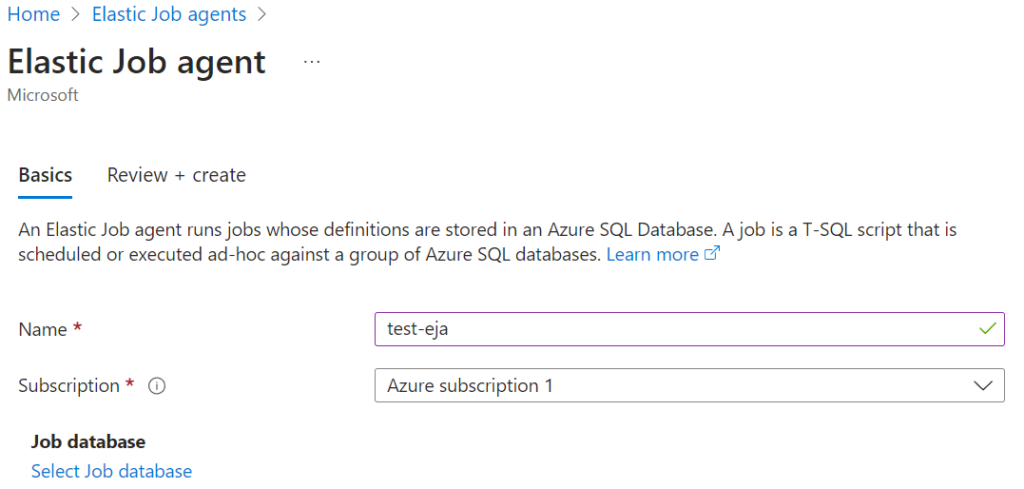
First you’ll have to create an Elastic Job Agent in the Azure portal. This is where you select the previously created database to act as job database.
That’s all the portal can do for you, the creation of jobs is done through TSQL in that database.
Locking stored procedure
The below procedure needs to be present in every server in the target group (in the master database in the dba schema)
CREATE PROCEDURE dba.sp_lock_logins
AS
BEGIN

DECLARE @sql_txt nvarchar(1000);
DECLARE @login_name NVARCHAR(50);

DECLARE open_logins CURSOR FAST_FORWARD READ_ONLY FOR
SELECT Login_Name
  FROM dba.[Unlocked_Logins]
 WHERE Locked_Date IS NULL  -- still unlocked
   AND Expiry_date < GETDATE()
   AND Login_Name not in ('mattias','mytopadmin')

OPEN open_logins

FETCH NEXT FROM open_logins INTO @login_name

WHILE @@FETCH_STATUS = 0
  BEGIN

SET @sql_txt = 'ALTER LOGIN ' + @login_name + ' DISABLE'
print 'Locking ' + @login_name

EXECUTE sp_executesql @sql_txt

SET @sql_txt = 'UPDATE dba.[Unlocked_Logins] set Locked_Date = getdate() where Login_Name = ''' + @login_name +
               ''' and Locked_Date is null'
EXECUTE sp_executesql @sql_txt

    FETCH NEXT FROM open_logins INTO @login_name
  END

CLOSE open_logins
DEALLOCATE open_logins
END
GO
The procudure basically checks the unlocked_logins table for any records with locked_date that is NULL (meaning it is still unlocked) and that have an expiry date that is before the current time (so it expired earlier then now). I also check not to include login_names that shoudl never be locked (imagine someone entering a record in this table and locking out important logins).
It then disables the login and updates the unlocked_logins table with a final locked_date.
Permissions
grant execute on dba.sp_lock_logins to job_loginSetting up the Elastic Job
The elastic job can be defined after creating
- Target group : the database server against which to execute the job
- Members of the target group : adding servers to the target group
- The Job : define against which target group this job needs to run and with what frequency
- The job steps : the different parts of the job
Below is the TSQL with which you can define this. In Azure portal, you’ll find this setup back after you completed the steps. You can’t modify it in the portal, it’s just a read-only view. You do get execution results and durations.
-- Add a target group containing all server you want to execute the lock stored procedure on
EXEC jobs.sp_add_target_group 'TestServers';

-- Add a server target member
EXEC jobs.sp_add_target_group_member
@target_group_name = 'TestServers',
@target_type = 'SqlDatabase',
@server_name = 'axis0-eu.database.windows.net',
@database_name = 'master'

-- Define the job (wrapper for the different steps)
DECLARE @JobName NVARCHAR(128) = N'Lock Accounts';
DECLARE @JobDescription NVARCHAR(512) = N'This job will run every 10 minutes to lock accounts';
DECLARE @Enabled BIT = 1;
DECLARE @ScheduleIntercalType NVARCHAR(50) = N'Minutes';
DECLARE @ScheduleIntervalCount INT = 10;
DECLARE @ScheduleStart DATETIME2 = N'20230620 06:00';

EXEC jobs.sp_add_job @job_name = @JobName,
@description = @JobDescription,
@enabled = @Enabled,
@schedule_interval_type = @ScheduleIntercalType,
@schedule_interval_count = @ScheduleIntervalCount,
@schedule_start_time = @ScheduleStart;

-- Define the job step
DECLARE @JobName NVARCHAR(128) = N'Lock Accounts';
DECLARE @JobStepName NVARCHAR(128) = N'Lock Accounts';
DECLARE @Command NVARCHAR(MAX) = N'exec dba.sp_lock_logins;';
DECLARE @CredentialName NVARCHAR(128) = N'job_login';
DECLARE @TargetGroupName NVARCHAR(128) = N'TestServers';
DECLARE @retryAttempts INT = 0;

EXEC jobs.sp_add_jobstep @job_name = @JobName,
@step_name = @JobStepName,
@command = @Command,
@credential_name = @CredentialName,
@target_group_name = @TargetGroupName,
@retry_attempts = @retryAttempts;
And with this, the tedious setup of Elastic Jobs is also done. Time to join everything together.