Often enough, a single Power Automate flow can be a perfect solution for a simple task. But when you start copying that solution for different triggers, it can soon become a maintenance nightmare. This article tries to describe a more scalable architecture.
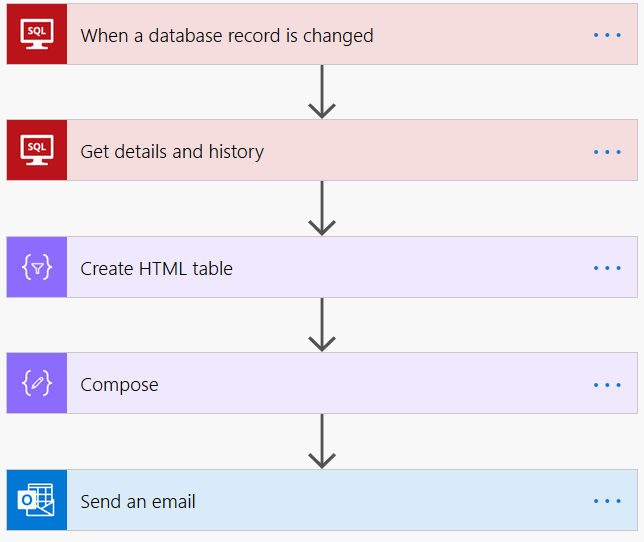
The use case for this case is “I want to receive an email when a record in a SQL database changes”. Sounds straightforward:
1. trigger : SQL Connector’s “When a record is changed”
2. action : get some more data from related tables
3. action : transform in an HTML table
4. action : send email
This works fine, but a few days later, the flow is so popular, that it needs to be deployed for another database, same exact setup, different users to be notified.
In a few weeks, you have 30 flows, which are no longer easy to maintain. Changes requested in one flow need to be applied to all flows, etc…
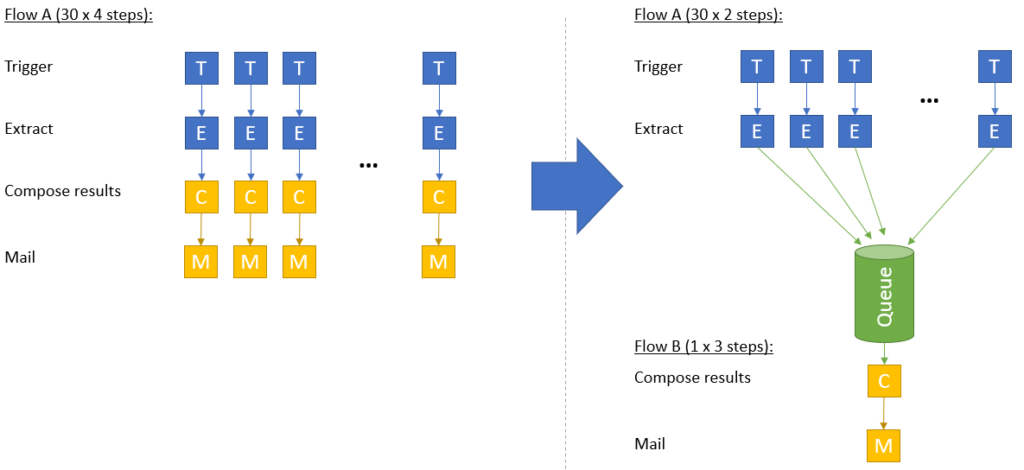
Architecture
The following describes a setup where the data-extraction layer (in blue) is separated from the data-processing layer (in yellow).
Queue
Let’s setup a queue in an Azure Storage Account. In Overview, click Queues and click + to add a new one.
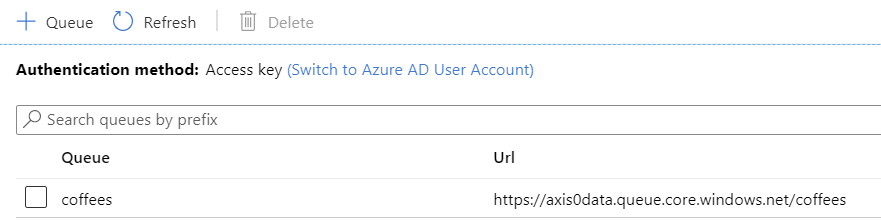
Retrieve your access key from the storage account, you’ll need it later to setup the connection in PowerAutomate.
Flow A

This flow will have to exist for each trigger, as we want to monitor e.g. 30 tables.
The purpose of the flow is to extract all required data, create a JSON message and write it to an Azure Queue. I’ll detail this step by step.
1. When an item is modified (V2) – trigger
Create a connection to your database, and specify the table that will fire the trigger when a record is changed.
2. Execute a SQL Query (V2)
This step optionally retrieves more information from the database. (e.g. a log of recent transactions, customer details, etc…)
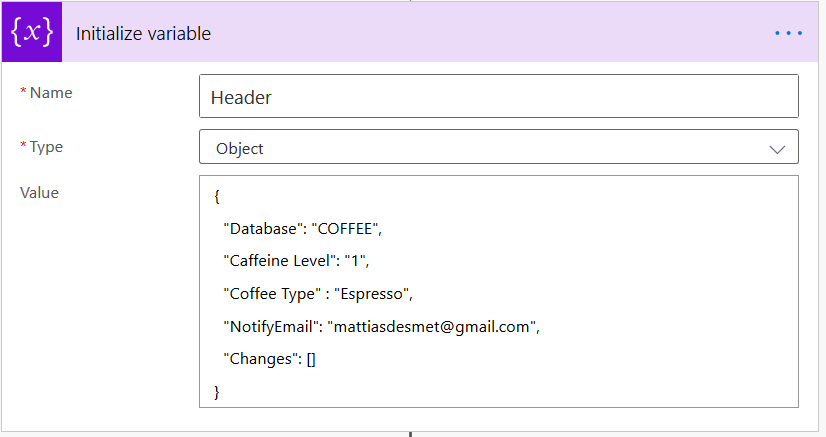
3. Generate JSON
Here we’ll create the message that will be put on a queue in the next step.
To start, initialize a variable with a JSON object. The property Changes will be initialized with an empty array, which is a placeholder for the records we retrieved in step 2.
The next step is to inject the records in the array. This can be done with a Compose action using the expression:
setProperty(variables('Header'), 'Changes', body('AllRecords').ResultSets.Table1)

The syntax can be found on Microsoft documentation site
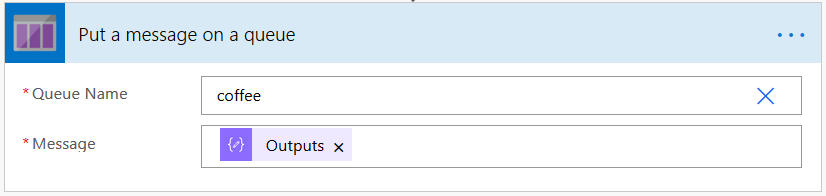
4. Put message on the queue
Add the Put message on a queue action and configure the connection with the access key obtained earlier.

Select the queue from the dropdown and specify Outputs (the outputs from the previous step Compose) as the message.
That’s all for Flow A. It will trigger at every change, and you can have it monitor multiple tables in multiple Flow instances.
Flow B
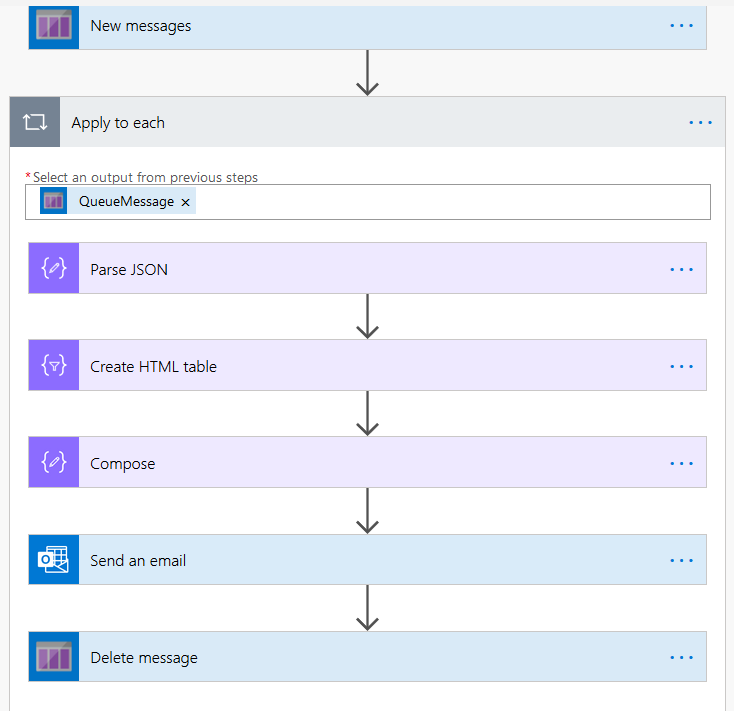
All that’s left to do is retrieve the message from the queue, and format it to be send as an email.
1. When there are messages in a queue
Connect again to our queue. This will fire when a new message is received and will return up to 32 messages. That’s why the next step will create an Apply to each loop.
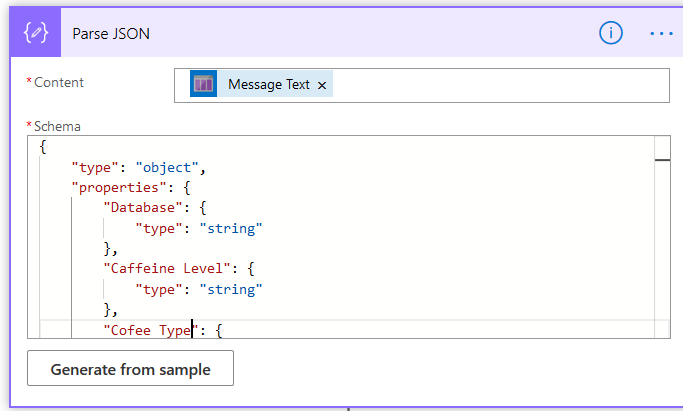
2. Parse JSON
In order to access the properties, we’ll turn the message back into a JSON object. Generate a schema from a sample message, e.g. in our example:
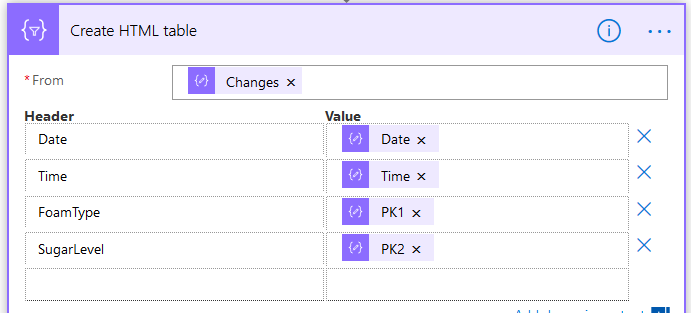
3. Create HTML table
This is only needed to format the resultset from the Changes attribute in a table for the email.
4. Compose
In order to add a little formatting to the HTML table, use an expression to add padding and other styles.

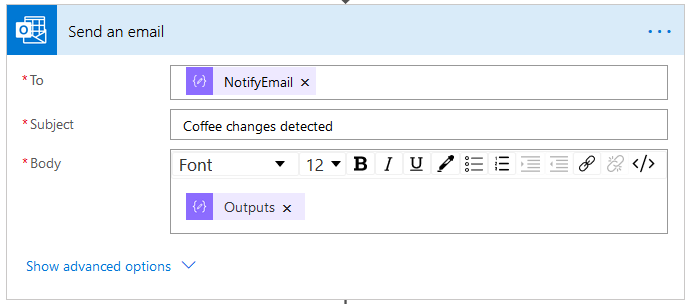
5. Send Email
Using all the properties from the message, you can now complete the emailing action
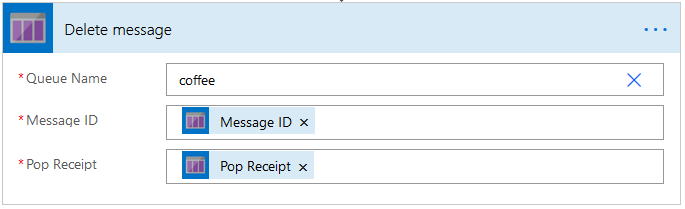
6. Delete message
Final, but not unimportant step is to remove the message from the queue. You can use the Message ID and the Pop Receipt for this.
Conclusion
With two independant PowerAutomate flows, we were able to scale the single flow to a more easily manageble and reliable solution. Changing data in the database table is observed by flow A. The JSON message enriched with other data from the database flows into the queue in our Azure Storage Account. As a result, the flow B will be triggered and a email sent with all required details.